Circles, bags, wrinkles. Under eye problems. As I’ve gotten older (I’m 41 now), those problems have gotten a bit harder to deal with. When I was younger, using the “triangle of light” concealer tip with a super pigmented concealer was the best concealer hack ever.
Things are different now. Even though my under eye area is relatively free of fine lines and wrinkles, my favorite under eye concealers have become too thick, and by mid-afternoon they will settle and crack, creating wrinkles where I do not have them. I can not deal with this, I knew I had to start doing something different to hide my bags and circles once I hit 40.
I did totally change up how I apply corrector and concealer to my undereye area, and after a lot of experimentation I did find some new favorite under eye concealers for over 40.
But how do you incorporate this with your other makeup? What does this really look like in practice? I got this question on my how I apply liquid foundation post (note, I was 36 when I published this, so not dealing with the over 40 undereye issues yet).
It was very difficult to put this routine together and incorporate your concealer post. The concealer post mentions adding specific layers to under eyes prior to application. But I had already applied foundation in the order you mentioned above?
I’m 45… and lately everything settles. I end up with creases under my eyes. Makeup settling into pores despite primers. And setting… sorry, don’t even get me started. It seems to make me glow in the dark! Well, more like super shiny. Augh.
I promised a post showing how I pull all of these tips together, but of course it took me forever to get one put together over the summer. Now that my girls are back to school, I finally have the time to tackle this issue!
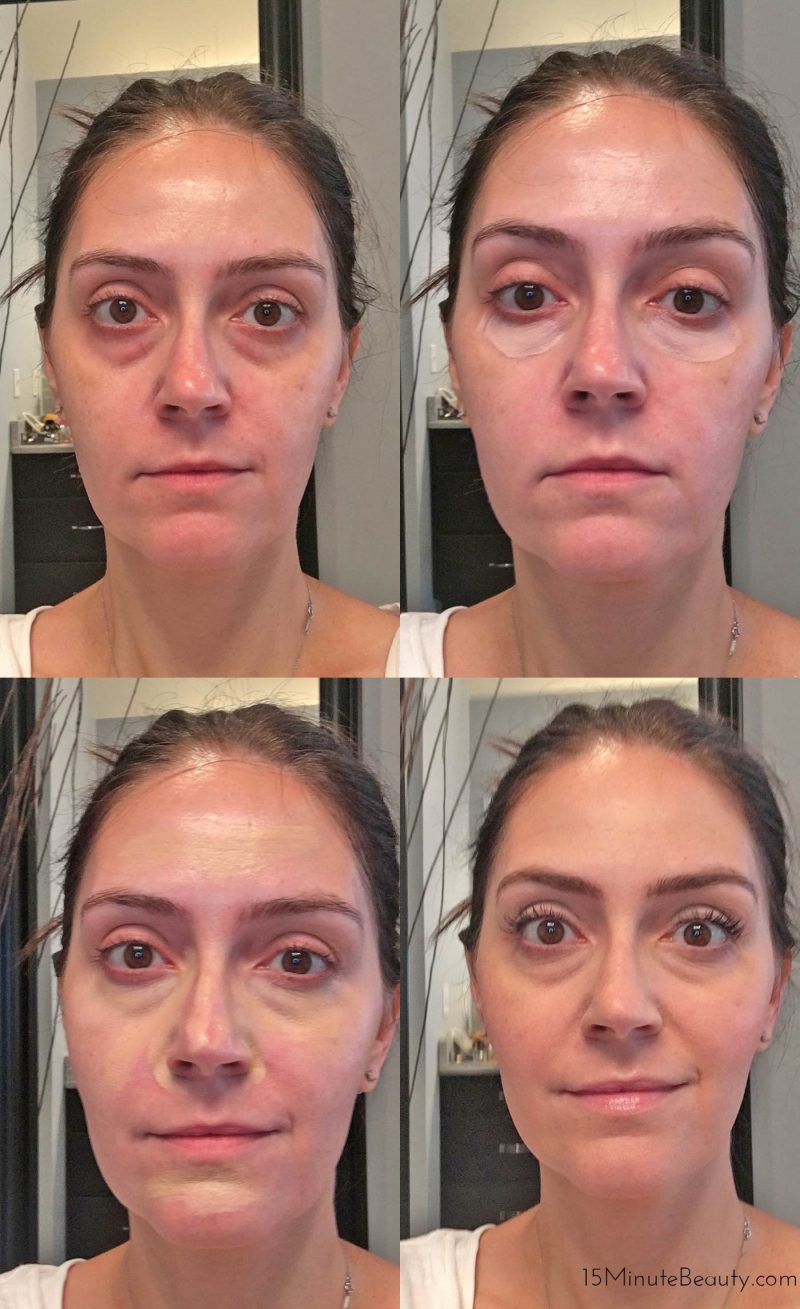
I took some pictures a few weeks ago to show myself as I went through my makeup application process. Be kind, these pictures were taken with my phone in my bathroom (where the overhead lights are a bit strong and therefore they emphasize shadows), and I had just come home from 48 hours on call in the hospital. I probably should have waited to take these pictures until I wasn’t quite so tired!
The first thing you should know is that I treat my face and my under eye area as completely separate areas. I want the makeup between the 2 to blend together and look seamless, but I really have different makeup layers in those areas and they don’t mix.
The key for avoiding caking is light layers of makeup, lighter coverage than I used to use, and I need to limit the number of layers in each area.
Prep
I start by prepping my face. I apply an eye cream to the semi-circle under my eye, I pat rather than rub (somehow this really does affect concealer application, I swear). I then apply a light moisturizer to the rest of my face. I don’t overlap the moisturizer over my eye cream, that seems to be too much product in this area.
I let my moisturizer sink into my skin completely, usually I wait at least 5 minutes or so before moving on to the next step. In practical terms, that means I go and brush my teeth, dry my hair, something else to keep my morning moving while I let my moisturizer sink in to my skin.
If I am applying a primer, I do it once my moisturizer is ready for makeup. I am very targeted with my primer, it goes primarily in my t-zone, and I only use it under skin toned coverage. So, it can go over moisturizer and under foundation, but it doesn’t go over a BB cream, that just creates a mess.
Color Correct
My next step is color correction (learn more about color correction makeup). It goes only on areas that are discolored, and you can see that on this tired post call day that was pretty much my entire under eye area!
I definitely have some redness, but if I am at all dark I’ll reach for a peach color corrector instead of a green corrector. I’ve found that it is best to use 1 color corrector instead of 2. If I look extra bad, I’ll use a corrector with light reflection built in. I have found that for my eye area I must use a liquid corrector, sticks and creams are too thick and will cause caking later.
I pat this in gently with a fingertip, but since more will go on over top I don’t go crazy blending. Note that I usually let this sit for a few minutes after my light blending, I apply my eye makeup next. If I move right on to concealing this can make things cakey later, I don’t know why.
My favorites:
Trish McEvoy Instant Eye Lift
Maybelline Instant Age Rewind Eraser Dark Circles Treatment Concealer in Brightener, that one is a bit pink/peach
Giorgio Armani Master Corrector
Conceal
In the bottom left picture above you can see where I’ve now applied concealer. I apply a light consistency, light to medium coverage concealer. Under my eyes I concentrate this into the semi circle under my eyes, though I do a little bit of a triangle still. I also apply around my nose, down the center of my nose (foundation alone there seems to rub off not matter what I do with primers), the middle of my chin (to help cover up redness) and some on my forehead as well.
Once I’ve roughly distributed my concealer, I will use a small brush (this one is my favorite, but this one is cheaper and also works) and buff around my face in small circles to blend it a little more. This is only a brief, 30-60 second buffing, I’ll do more blending in a minute.
My favorites:
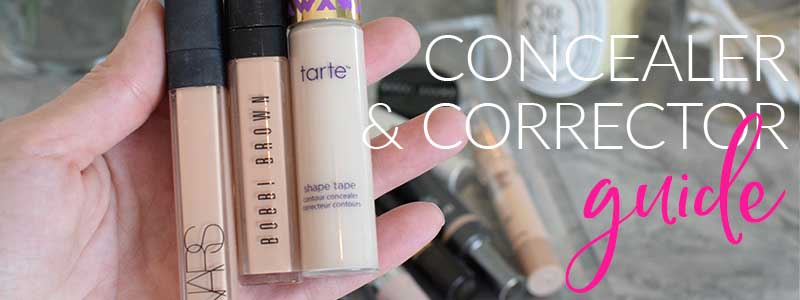
Maybelline Instant Age Rewind Eraser Dark Circles Treatment Concealer
NARS Radiant Creamy Concealer
Face Coverage
Once I’ve semi-blended in my concealer, I decide if I want more coverage. There are many days that the concealer is enough coverage for me.
If I want more coverage, I’ll add a bit of a light to medium coverage foundation to areas that need more coverage. Note that if I need coverage in the under eye area, I do that with a little concealer, foundation never goes under my eyes as that increases my risk of caking later on. Otherwise I’ll apply my concealer to areas that want coverage, this usually ends up being a bit on my forehead, my nose, and my cheeks under my eyes (moving in toward my nose).
When applying my foundation, I apply a small amount and dot it around so the foundation doesn’t need to be moved much for blending. I blend my face again with the same brush, again in little circles. After the brush I do grab a BeautyBlender and bounce it over any areas that need more blending, usually that’s on the tip of my nose and a bit under my eyes.
Set
I try to get away with the smallest amount of powder possible. Unfortunately I can’t skip powder completely, my light layers melt away without any powder at all!
I use the Laura Mercier Powder with my BeautyBlender, I just tap a very tiny amount on to my under eye area and down my t-zone.
How I Use BB Cream
Everything I said above is what I do on days that I’m either using just a concealer, and maybe adding in a foundation. I do wear BB Cream many days, and that changes things a little.
I apply the BB Cream just like my regular lightweight moisturizer. It goes on after my eye cream, on clean and dry skin. I let it sink in to my skin like regular moisturizer before I put any makeup on over the top. I don’t blend it until I’m blending in my concealer, and then I just use the brush all over my face.
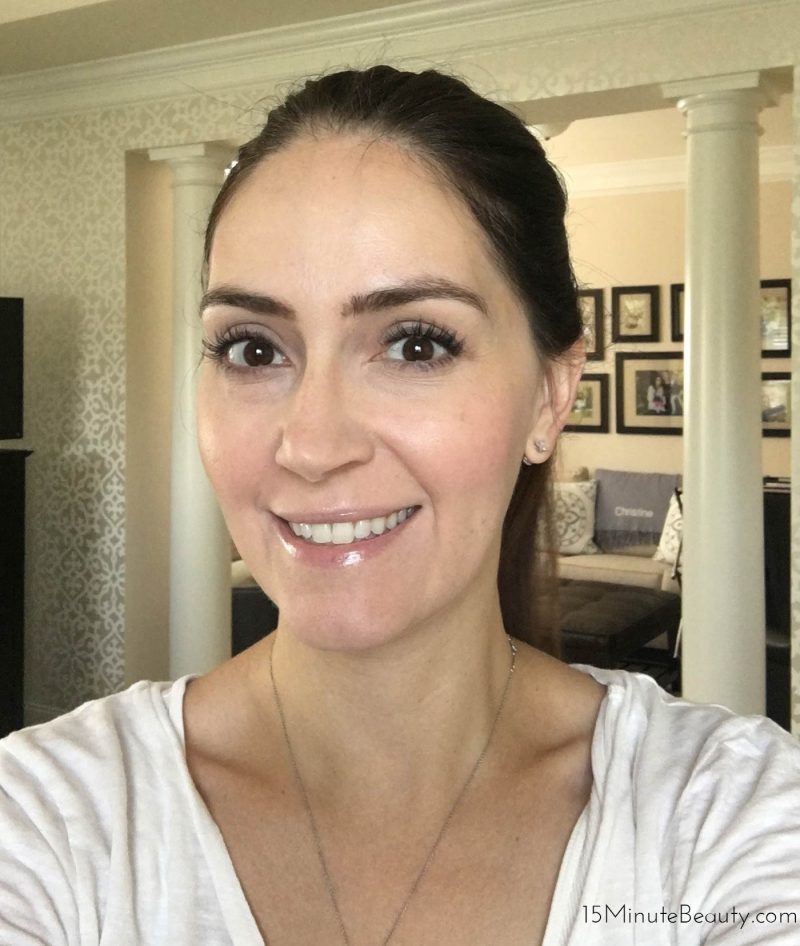
Here’s how my makeup looked on this super tired post call day. There’s only a few minutes between this picture (in sunlight in my bedroom) and the pictures above. You can see my undereye circles look much better, and best of all this won’t cake all day!


 I’m a doctor, a mommy and a bit of a beauty addict. If you let me, I can take 2 hours to get ready in the morning. Really. I'm on a quest for faster beauty that works!
Thanks for a great tutorial. I’ve never wore much make-up and now I’m older, it’s been a battle. I will definitely try your routine. It’s easy, not much make-up and very flattering.
You have great skin!
Awww, thanks! I’m good at faking it with makeup!! 🙂
Very helpful
My undereye area is very prominent
Anything I can do to minimize this, will be great
You look amazing thanks for the tips. I’m 43 and I find myself also using less foundation and only conceler. I find the more I put on it’s looks like I’m trying to hide wrinkles I don’t even have yet. Along with the caked on look I have found less is more the older I get. I always look forward to your tips. My favorite conceler is shape tape by tarte and a little goes along way. Some days I have enough on my brush I can go under my eyes the next day.
I agree, lately I’ve just been applying moisturizer, then primer and then concealer over the top. I blend with a brush and that’s it! It looks much better. I’m obsessing over this maybelline concealer currently.
Hi I’m Eileen I have a problem with my bags under the eyes also. And I need to know what you use in terms of corrector and concealer. Right now I use Elizabeth Arden concealer. Revlon color correction the pink. What should use, I have Olive skin?
I’m currently using this corrector and concealer, the brightener color is the corrector. It’s amazing and it’s from the drugstore!
Wow! What a transformation! You look great.
Ha! Thanks 🙂
Very nice! Thank you for being so vulnerable, I appreciate it.
Thank you Thank you THANK YOU! Your post changed my whole make up routine for the better! Your tips were life changing for me!! Daily the foundation settled into my pores & my makeup looked awful & caky!! I realized moisturizer was extremely important & needed to settle before proceeding with the other steps! I am 61 and still learning! 😂 My makeup looks so much smoother & better! Thank you again!! 👏🏼🤗
I’m so glad it helped!
Hi! I turn 40 on Monday and have noticed creasing in my normal makeup routine. I decided I needed to do things differently and found this. It worked wonders!!!! Almost 12 hrs later and my makeup looks great, with no creasing. Thank you so much!
I love this!! I’m so glad it helps 🙂
Loved good job sis I’m almost 70 it’s harder for me to do My make up correctly now hard to cover the dark circles
This was super helpful, for a 44 year old novice! Keep them coming
1.Get some sleep you beautiful lady!
2. Awesome job explaining and providing suggested brands. I am way to old to go without concealer and color correction but am having to relearn everything after not wearing makeup for years. It has been a struggle.
I’ve Never been good at knowing & applying foundation? Do I go with Liquid ( which I find when I apply is so Noticeable that I’m wearing it) I’m usually applying Powder Foundation which I’ve read that over 60 you shouldn’t do HELP!!!????
I’ve lately been loving creams. Apply with a full brush, small amounts and pat the brush onto the face (no rubbing or sweeping). Either the What the Foundation from Jones Road or the cream from Patrick Ta.
Thank you for the tips. Really helped me a lot! Oh and you look beautiful even if you’re tired! And last but not least, thank you For all the work you do as a nurse. . We really appreciate it.
I’m actually a doctor, not a nurse. But thanks! 🙂